
Replacing a brake master cylinder might seem tricky at first, but it’s manageable if you’ve got some mechanical experience. You’ll need basic tools, patience, and a good eye for detail. If you’re new to car repairs, though, it’s okay to ask for help. Safety always comes first!
Key Takeaways
- Collect all tools and supplies before you begin. You will need a new brake master cylinder, wrenches, brake fluid, and safety gear. Being ready helps save time and avoid stress.
- Make sure the new brake master cylinder fits your car. Check the part numbers or look at your manual to prevent problems during installation.
- Test the brakes carefully after you finish. Press the brake pedal and take a slow test drive to make sure they work well before driving normally.
Step-by-Step Guide to Replacing a Brake Master Cylinder

Tools and materials you’ll need
Before you start, gather everything you’ll need. Here’s a quick checklist:
- A new brake master cylinder (make sure it’s compatible with your vehicle).
- Wrenches (usually a combination of open-end and line wrenches).
- A brake fluid reservoir and fresh brake fluid.
- A turkey baster or fluid pump for draining.
- A catch container for old brake fluid.
- Safety gear like gloves and goggles.
Having these tools ready will save you time and frustration later.
Locating the brake master cylinder
The brake master cylinder is usually found under the hood, near the driver’s side firewall. Look for a rectangular or cylindrical reservoir filled with brake fluid. If you’re unsure, check your vehicle’s manual for guidance.
Tip: Take a picture of the setup before you start. It’ll help you reconnect everything correctly later.
Draining the brake fluid
Use a turkey baster or fluid pump to remove as much brake fluid as possible from the reservoir. Place a catch container under the brake lines to collect any remaining fluid. This step prevents spills and keeps your workspace clean.
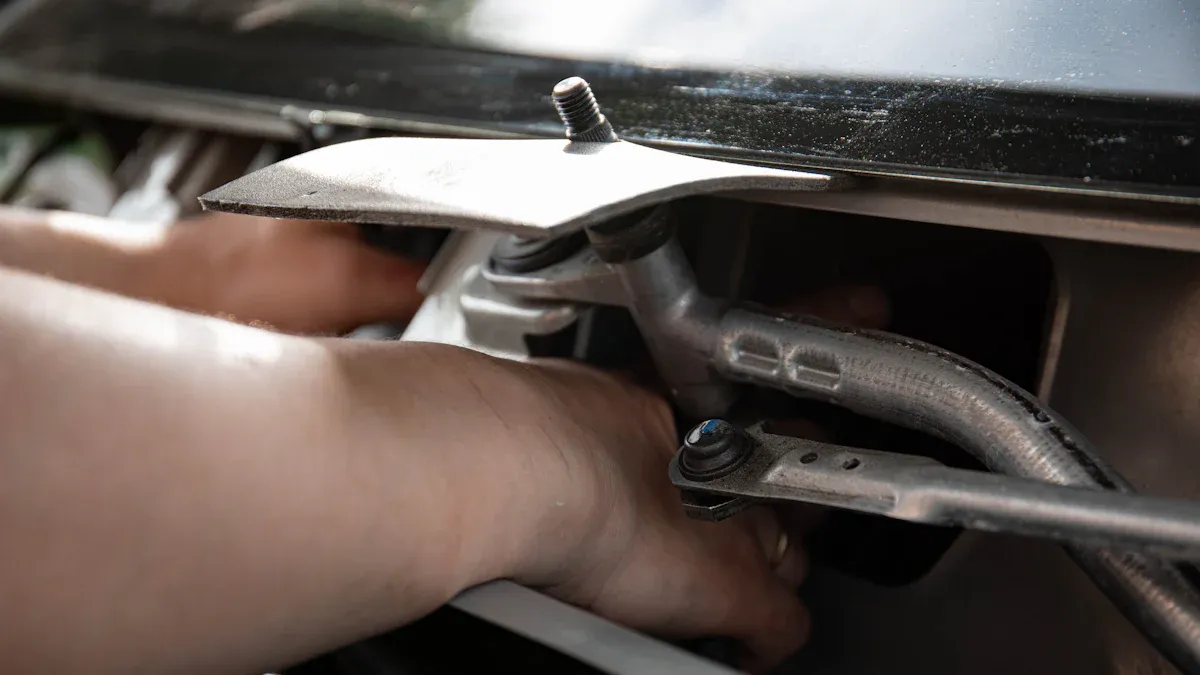
Disconnecting brake lines and electrical connections
Carefully loosen the brake lines using a line wrench to avoid stripping the fittings. Disconnect any electrical connections attached to the brake master cylinder. Label the connections if needed to avoid confusion during reassembly.
Removing the old brake master cylinder
Once the brake lines and connections are detached, remove the bolts securing the brake master cylinder to the firewall or brake booster. Gently pull it out, being cautious not to spill any remaining fluid.
Installing the new brake master cylinder
Position the new brake master cylinder in place and secure it with the bolts. Double-check that it’s aligned correctly before tightening. This ensures a proper fit and prevents leaks.
Reconnecting brake lines and electrical connections
Reconnect the brake lines and electrical connections to the new brake master cylinder. Tighten the fittings securely but avoid overtightening, which could damage the threads.
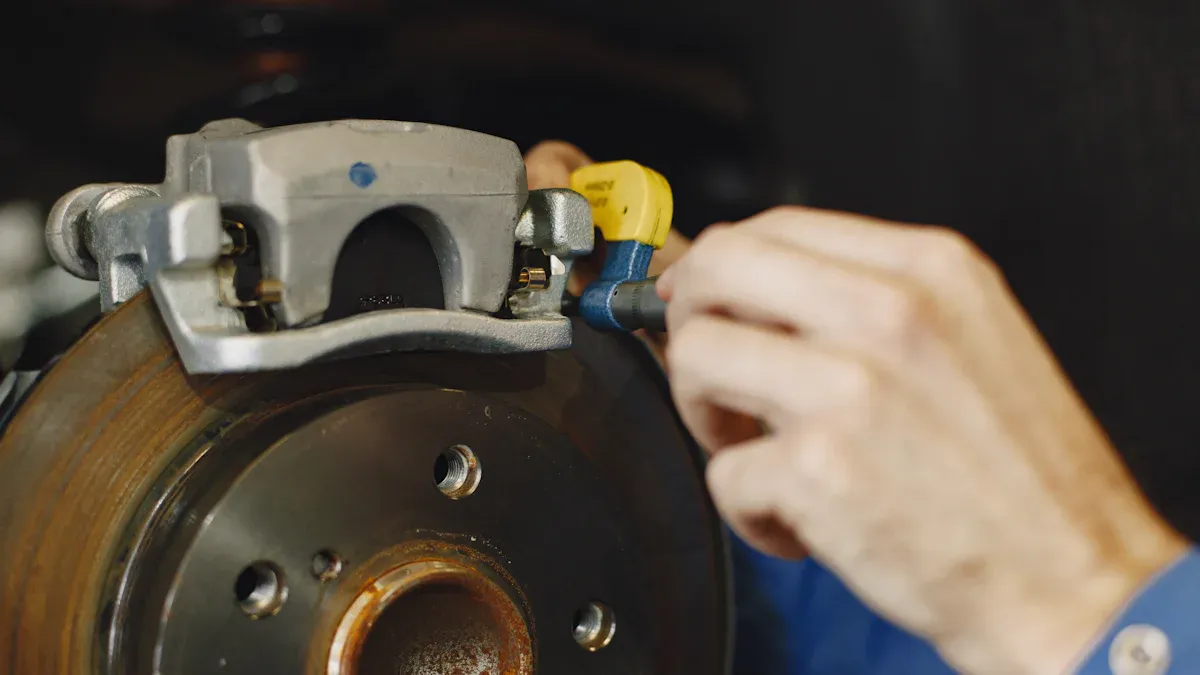
Refilling and bleeding the brake system
Fill the reservoir with fresh brake fluid. Then, bleed the brake system to remove air bubbles. This step is crucial for restoring proper brake pressure. Follow the manufacturer’s instructions for bleeding, or consult a professional if you’re unsure.
Tips for a Successful Brake Master Cylinder Replacement
Verify compatibility of the new master cylinder
Before you start, double-check that the new brake master cylinder matches your vehicle’s make and model. Even small differences can cause big problems. Look at the part number or consult your vehicle’s manual to confirm compatibility. If you’re buying online, read reviews or ask the seller for advice. Taking this step saves you from unnecessary headaches later.
Pro Tip: Bring the old master cylinder with you when shopping for a replacement. It’s easier to compare them side by side.
Use the correct tools to avoid damage
Using the right tools makes the job smoother and prevents damage to parts. A line wrench, for example, is perfect for loosening brake lines without stripping them. Avoid improvising with the wrong tools—it can lead to costly mistakes. If you’re missing something, consider borrowing or renting tools from an auto parts store.
Follow the manufacturer’s instructions closely
Every brake master cylinder is slightly different. The manufacturer’s instructions are your best guide for proper installation. Read them carefully before you begin. They’ll often include specific torque settings or bleeding procedures that are crucial for success. Skipping this step could lead to leaks or poor brake performance.
Test the brakes thoroughly after installation
Once everything is back in place, don’t skip testing. Pump the brake pedal a few times to build pressure. Then, take the car for a slow test drive in a safe area. Pay attention to how the brakes feel. If they’re spongy or unresponsive, you may need to bleed the system again. Testing ensures your brakes are working perfectly before hitting the road.
Reminder: Never drive your car until you’re 100% confident the brakes are functioning properly.
Safety Precautions When Replacing a Brake Master Cylinder
Wear protective gear, including gloves and goggles
Safety should always come first when working on your car. Brake fluid can irritate your skin and eyes, so wearing gloves and goggles is a must. Choose chemical-resistant gloves to protect your hands and snug-fitting goggles to shield your eyes. If you’re working in a dusty or poorly ventilated area, consider wearing a mask too. It’s better to be over-prepared than to risk an injury.
Tip: Keep a clean rag nearby to wipe off any accidental spills on your gloves or tools.
Handle brake fluid carefully to avoid spills
Brake fluid is not only harmful to your skin but can also damage your car’s paint. Be extra cautious when handling it. Use a funnel when pouring new fluid to avoid messy spills. If you do spill some, clean it up immediately with a damp cloth. Always dispose of old brake fluid properly—never pour it down the drain.
Reminder: Store brake fluid in a sealed container and keep it away from children and pets.
Ensure the vehicle is securely lifted or parked on a flat surface
Before you start, make sure your car is stable. If you’re lifting it, use jack stands for added safety. Never rely on just a jack to hold the car up. If you’re not lifting the vehicle, park it on a flat surface and engage the parking brake. A stable car prevents accidents and makes your work easier.
Do not drive until the brakes are fully tested
Once you’ve replaced the brake master cylinder, testing the brakes is non-negotiable. Pump the brake pedal to build pressure and check for leaks. Take your car for a slow test drive in a safe area. If the brakes feel spongy or unresponsive, bleed the system again. Don’t hit the road until you’re 100% sure the brakes are working perfectly.
Warning: Driving with faulty brakes is extremely dangerous. Always double-check your work before driving.
Replacing a brake master cylinder is doable if you’ve got some mechanical know-how. Just follow the steps carefully and stick to safety guidelines. If you’re unsure or run into trouble, don’t hesitate to call a professional.
Remember: Your brakes are critical for safety. It’s always better to be cautious than to risk it!
FAQ
How long does it take to replace a brake master cylinder?
It usually takes 1-2 hours if you’re experienced. For beginners, it might take longer. Take your time and don’t rush.
Can I drive immediately after replacing the brake master cylinder?
No, you shouldn’t. Test the brakes thoroughly first. Make sure they feel firm and responsive before driving. Safety always comes first!
What happens if I don’t bleed the brake system?
Air in the brake lines can cause spongy brakes or complete brake failure. Bleeding the system ensures proper brake pressure and safe driving.
Tip: If you’re unsure about bleeding, ask a professional for help. It’s a critical step!
Post time: Apr-06-2025